

Last Updated: October 28, 2026
Quick Summary
Embroidery satisfaction comes from fixing the design, fabric setup, and tension before stitching, then checking every finished piece against a written standard. Approve a proof first, use the right stabilizer, run a test stitch, and inspect both the front and back before packing.
- Have the customer approve a proof showing size, placement, and colors before stitching begins.
- Use cut-away stabilizer for knits and tear-away for stable woven fabrics.
- Run a test stitch on scrap fabric with the same stabilizer before every new garment type.
- Check both the front and the back of each piece before packing, including loose thread ends.
- Wash-test a sample five times, since most shops use five cycles to simulate a few months of wear.
Table of Contents
- What Embroidery Satisfaction Actually Means
- Step 1: Lock Down the Design Before Stitching
- Step 2: Set Up Fabric, Hooping and Stabilizer Correctly
- Step 3: Prevent Puckering and Balance Thread Tension
- Step 4: Run a Custom Embroidery Quality Checklist
- Step 5: Troubleshoot Common Defects by Symptom and Cause
- Step 6: Build Durability Into the Finished Piece
- Your Next Step: Send Us Your Design Idea
- Frequently Asked Questions
What Embroidery Satisfaction Actually Means
Embroidery satisfaction can mean different things to different people. When considering a custom piece, think about the details that matter most to you.
Step 1: Lock Down the Design Before Stitching
Most satisfaction problems start before the machine turns on. A vague idea leads to a design that looks different once it is stitched.
Before you start, confirm these details:
- Final artwork or text: Spell every word and check names and dates twice
- Size: Note the exact width and height on the garment
- Placement: Decide where the design sits (left chest, center back, sleeve)
- Colors: Pick thread colors and confirm how many you need
- Reference image: Save a photo of how the finished piece should look
Ask the customer to approve a proof before stitching. A proof is a simple layout that shows size, placement, and colors. Approval at this stage prevents most redo requests.
Watch out: Text that looks fine on a screen can become hard to read when stitched small. Very thin letters and tight spacing often fill in or blur. Enlarge the lettering or simplify it when the size is small.
Step 2: Set Up Fabric, Hooping and Stabilizer Correctly
The fabric is the foundation of the piece. A poorly hooped garment will shift, pucker, or stitch crooked no matter how good your machine is.
Follow this order:
- Choose the right stabilizer. Use a cut-away stabilizer for knits such as T-shirts and hoodies. Browse custom embroidered sweatshirts and crewnecks to see knit pieces stitched with personalized designs. Use a tear-away for stable woven fabrics.
- Pre-wash the garment if the customer plans to wash it. This prevents shrinkage after the design is stitched.
- Mark the center of the garment with a light pen line or a template.
- Hoop the fabric evenly. The fabric should be taut but not stretched. Stretched fabric springs back after stitching and distorts the design.
- Check alignment against your marks before starting.
Bulky areas like seams and pocket edges need extra attention. Avoid hooping over thick seams when you can, or the needle may skip stitches.
Step 3: Prevent Puckering and Balance Thread Tension
Puckering is one of the most common complaints. It looks like wrinkles around the stitches and usually means the fabric moved or was pulled too tight.
To prevent it:
- Use the right stabilizer for the fabric weight
- Add a water-soluble topping on towels, fleece, and other fuzzy fabrics so stitches sit on top
- Reduce stitch density on lightweight fabrics, since too many stitches pull the fabric together
- Check pull compensation settings in your design software for dense areas
Thread tension controls how the top and bottom threads meet. Balanced tension gives a flat, even stitch on both sides.
Signs of poor tension include:
- Loops of thread showing on the back
- Top thread pulled to the underside
- Bottom thread visible on the front
Run a test stitch on scrap fabric with the same stabilizer before every new garment type. Adjust tension in small steps, then stitch another test before moving on.
Step 4: Run a Custom Embroidery Quality Checklist
A consistent checklist catches problems that are easy to miss when you are focused on speed. Use it on every piece before packing.
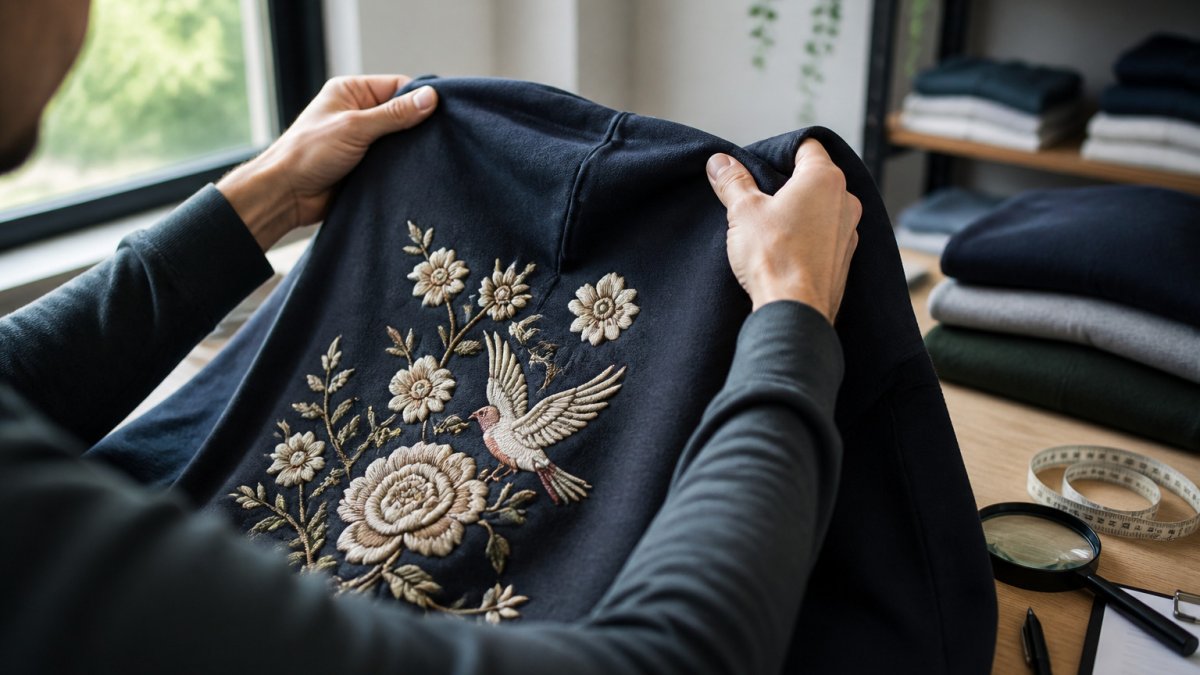
Check the front:
- Design is centered and level
- Letters are readable and spelled correctly
- Satin stitches have smooth, even edges
- Color changes line up cleanly
- No gaps or thin spots in fill areas
Check the back:
- Thread ends are trimmed and woven in
- No loose loops or bird nests
- Stabilizer is removed or trimmed close to the stitches
- No hard spots that will scratch the skin
Check the garment:
- No fabric puckering around the design
- No stains, hoop marks, or lint
- Size and placement match the approved proof
Watch out: Skipping the back-side check is a common mistake. Loose thread ends can work free after a few washes and cause the design to look unraveled.
Keep a short record of each check. A simple photo of the finished front and back helps you show the customer what they are getting.
Step 5: Troubleshoot Common Defects by Symptom and Cause
When something looks wrong, start with the symptom and work back to the likely cause. This saves time compared to changing several settings at once.
| Symptom | Likely cause | Fix |
|---|---|---|
| Thread breaks often | Old or wrong-size needle, tension too high | Replace needle, lower top tension |
| Loops on back | Top tension too loose | Increase top tension in small steps |
| Puckered fabric | Too little stabilizer or too dense stitching | Add stabilizer, reduce density |
| Gaps in satin stitches | Design sits off-center or hoop shifted | Recenter design, rehoop securely |
| Design looks crooked | Garment not aligned in hoop | Remark center and rehoop |
| Thread nests under plate | Bobbin thread wound unevenly or missing | Rewind bobbin, rethread machine |
Change one setting at a time. If the problem stays after a fix, return to the test stitch and try again.
Some defects happen only on certain fabrics. Terrycloth and fleece often need a topping, while thin knits need lighter density. Keep notes so you can reuse what worked.
Step 6: Build Durability Into the Finished Piece
A piece that looks perfect on delivery day and fails after five washes is not a satisfied customer, it is a return waiting to happen. Durability is the dimension most competitors skip, and it is the one that determines whether satisfaction holds over time. Build it in with a wash-testing protocol and stabilizer choices matched to the fabric's expected care routine.
Run a Wash Test Before You Promise Durability
Before committing to a durability guarantee on a new fabric or design combination, stitch a test sample on the same garment and run it through a controlled wash cycle:
- Stitch a 2-inch test design on a scrap of the same fabric with the same stabilizer and topping you plan to use.
- Wash it five times in cold water on a gentle cycle with a mild detergent, air drying between cycles. Five cycles is the minimum most shops use to simulate a few months of normal wear.
- Inspect after each cycle for loose thread ends, stitch cracking, puckering around the design edge, color bleed from the thread, and stabilizer breakdown.
- Record the results on the order sheet so you can repeat what worked or avoid what failed.
If the sample fails at cycle three, the production piece will likely fail for the customer too. Change the stabilizer, reduce stitch density, or switch to a softer backing before stitching the final piece.
Match Stabilizer to the Expected Care Routine
Durability starts with stabilizer choice, and the right choice depends on how the garment will be washed:
- Cut-away stabilizer (2.0-2.5 oz for knits): Best for T-shirts, hoodies, and polos that will see frequent home laundering. The remaining backing supports stitches through repeated agitation.
- Tear-away stabilizer: Suitable for stable wovens like denim or canvas that are washed less aggressively. It leaves a softer hand but offers less long-term support.
- Wash-away stabilizer (topping or backing): Use as a topping on terrycloth and fleece to keep stitches from sinking, and as a backing on delicate fabrics where any residual backing would show through.
- No-show mesh or lightweight cut-away: A middle ground for lightweight knits where a full cut-away feels too stiff but tear-away is not supportive enough.
Finish the Back So Nothing Works Loose
Durability also depends on how you finish the back of the embroidery:
- Weave in all thread ends rather than knotting them. Knots work free under agitation; woven ends stay put.
- Trim stabilizer close to the stitches without cutting the fabric or the stitch line. Excess stabilizer curls and pulls after washing.
- Check for bird nests and loose loops on the back before delivery. A single loose loop can unravel an entire color block after two or three washes.
Give Customers Care Instructions That Protect the Guarantee
Durability is a shared responsibility. Include simple care instructions with every order:
- Wash inside out in cold water on a gentle cycle
- Use mild detergent and avoid bleach and fabric softener
- Air dry or tumble dry low; high heat breaks down thread and stabilizer
- Avoid ironing directly on the embroidery; press on the reverse side with a pressing cloth
Clear care guidance protects the design, sets expectations, and gives you a documented basis for the durability guarantee. If a customer follows the care instructions and the embroidery still fails within a reasonable period, the guarantee should cover a repair or remake, which is why the wash test and stabilizer choice matter before the piece ships, not after.
Your Next Step: Send Us Your Design Idea
We'd be glad to help turn your ideas into something personal.
Read more about custom orders and share your idea, or browse our custom embroidered T-shirts to see how personalized designs look on the finished piece. For questions about your design, you can contact us directly.
Frequently Asked Questions
How can I make sure custom embroidery looks the way I expect?
Start with a clear design proof and a sample or test stitch-out when possible. Confirm size, placement, thread colors and the garment type before production begins. Ask for a photo of the approved design on the actual garment before it ships. Comparing that proof against your original idea catches most mismatches early, and it gives you a documented reference if anything looks off when the piece arrives.
What should I check before approving an embroidery design?
Check the overall size against the garment placement you want, the stitch colors, and whether small lettering is legible at that size. Look at fine details, since very thin lines and tiny text often fail to stitch cleanly. Confirm the exact spelling of any names or dates. Once you approve the proof in writing, changes usually require a new proof, so review it carefully before signing off.
How do I prevent puckering in machine embroidery?
Puckering usually comes from fabric pulled too tight in the hoop, too little stabilizer for a stretchy or lightweight fabric, or stitch density that is too heavy. Match the stabilizer to the fabric weight, hoop the fabric firmly without stretching it, and use a water-soluble topping on knits or napped fabrics. Reducing density on large fill areas also helps the fabric lie flat.
How can I make embroidery last through washing and wear?
Choose a stabilizer that stays stable through repeated washing, use quality thread, and avoid stitch densities that stiffen or tear the fabric over time. Wash the garment inside out in cool water on a gentle cycle, and air dry it. Avoid high heat in the dryer and never iron directly over the stitching, since heat can flatten the texture and weaken the thread.
